Group
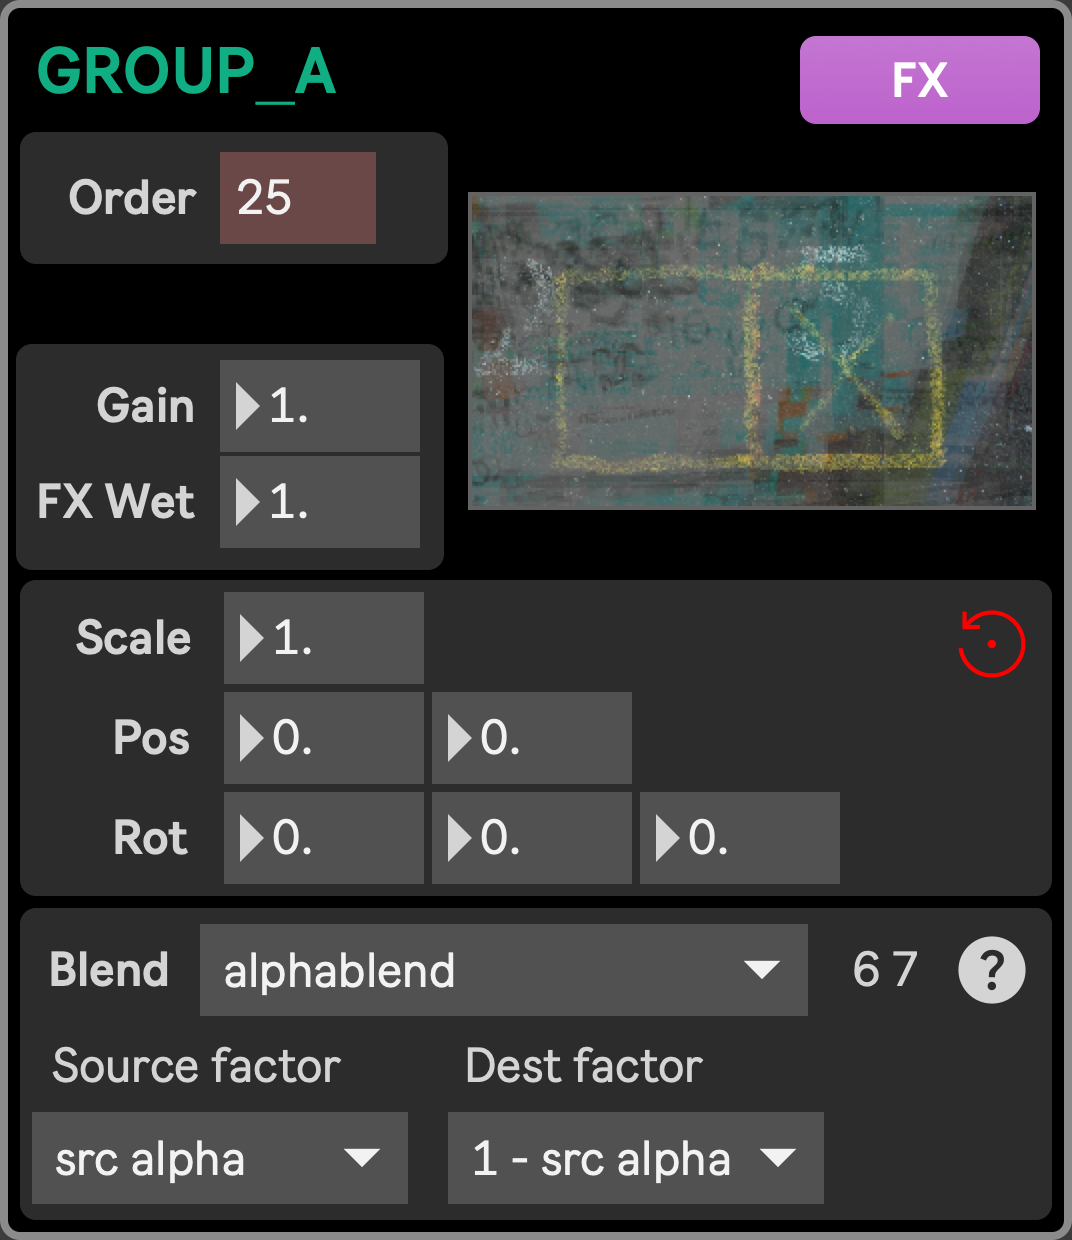
The Group module allows several Layers to be regrouped into a single sub-context, so that they can then be moved, scaled, faded or blended together as if they were a single layer. Two instances of this module are available, Group A and Group B, each acting as its own independent sub-context.
A Group gets enabled as soon as at least one Layer has its Group attribute set to it (see Source assignment and layer ordering). Layers assigned to a Group are drawn together according to their own Order attribute, and the resulting image is then composited into the main context, at the position defined by the Group’s own Order parameter, alongside layers left in main and the Stage.
The Order of a Group is part of the Setup presets. All other parameters are part of the Scenic presets.
This module can be accessed from the Mixer layout.
Parameters and controls
Section titled “Parameters and controls”- Order: defines the order in which this Group is drawn within the main context, alongside layers left in
mainand the Stage. Groups (or layers) with a higher Order number are drawn on top of those with a lower one, potentially covering them. - gain (Gain): gain of the group. 1. means the group is fully displayed, while 0. means it is completely faded out
- FX Wet: sets the wet/dry balance between the group’s composited image (0.) and its processed version through the FX Rack (1.)
- FX button: opens the FX Rack window, where effects can be applied to the group’s composited texture
- Reset button: resets all parameters visible on the module interface to their default value.
- scale (Scale): uniformly scale the group horizontally and vertically
- pos_x|pos_y (Pos): move the group horizontally (x) or vertically (y)
- rot_x|rot_y|rot_z (Rot): rotate the group on the x, y or z accessible around its center
- blend_mode (Blend): the blend mode defines the way this group gets blended into the main context (ie. with layers and the other group with a smaller Order number than this one). Only basic blend modes are available (add, multiply, screen, exclusion, colorblend, alphablend, coloradd, alphaadd), in addition to a few custom ones (Mask, Lightn, Hide, Dark, Negate). Setting the blend mode is a way to set both blend_src_factor and blend_dst_factor at the same time. For math friendly people, the blending formula is OUTPUT = (SRC_IMAGE * blend_src_factor) + (DEST_IMAGE * blend_dst_factor), where SRC_IMAGE is the composited texture of this group, DEST_IMAGE is the result of the blending of the subsequent layers/groups, blend_src_factor and blend_dst_factor are defined below, and OUTPUT is the resulting image, possibly to be blended with layers/groups above it. The ? button next to the Blend menu recalls this formula.
- blend_src_factor (Source factor): the factor by which is multiplied the source image (the composited texture of this group). Available values are zero, one, dst color, src color, 1 - dst color, 1 - src color, src alpha, 1 - src alpha, dst alpha, 1 - dst alpha, src alpha saturate.
- blend_dst_factor (Dest factor): the factor by which is multiplied the destination image (the texture resulting of the blending of subsequent layers/groups). available values are zero, one, dst color, src color, 1 - dst color, 1 - src color, src alpha, 1 - src alpha, dst alpha, 1 - dst alpha, src alpha saturate.