Managing Presets
Preset interface
Section titled “Preset interface”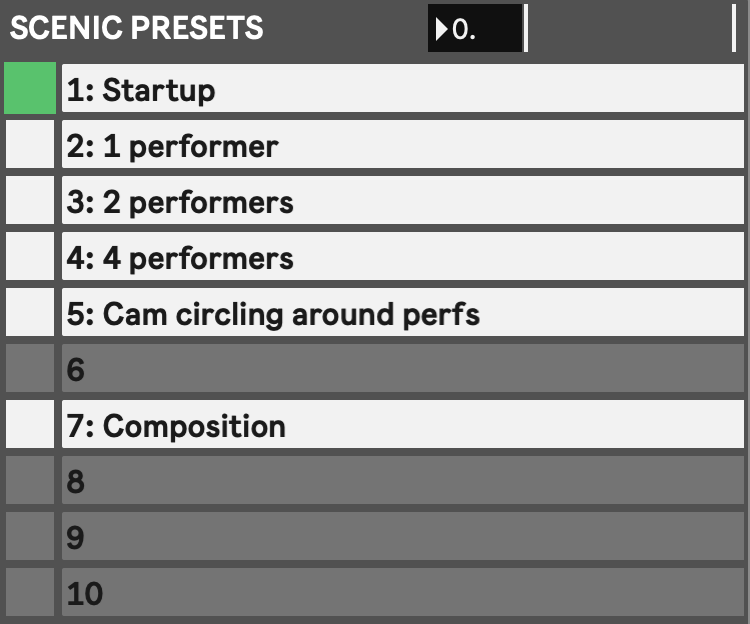
All types of presets can be managed by using a similar interface allowing to recall, create, delete and organize presets, and for the performance-oriented presets (Scenic, performer and blackbox), interpolate between two presets.
Here is the interface for Scenic presets, knowing that all other presets will share some, if not all of these controls:
-
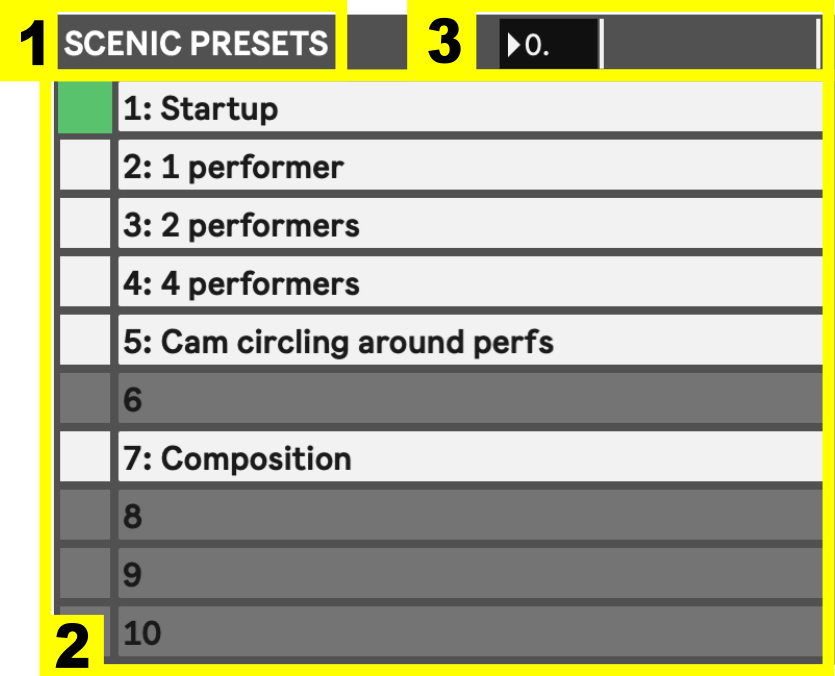
Preset type, as a reminder of what gets controlled here. In addition to the name, the background color is also shared with parameters stored in this preset type.
-
Preset list: this is the central part to manage presets. Each line represents a preset slot. All white lines are filled preset slots, meaning there is an existing preset on this line. Other lines are empty - no preset there. A handful of interactions are possible here:
- Recall (load) a preset: double-click the square on the left of a filled preset slot. If an interpolation time is set (see 3. below), the current state will be interpolated toward the clicked preset in the set time. If you want to recall a preset immediately with no interpolation, you can hold
commandwhile clicking the preset. The last recalled (or “active”) preset is indicated by a green square, and the previously recalled preset by a light green tinted square, allowing you to remember from which preset you “come from”. Note that if you manually change parameters after recalling a preset, that preset will still be shown as the active one even though the current state of parameters won’t exactly reflect it. - Save a preset:
shift + clickon a square to save the current state of parameters as a preset. Clicking the square on an empty line will fill that line with a new preset. Clicking on a filled preset slot (white or green square) will overwrite the preset with the current state, while preserving its name. Note that overwriting a preset is definitive and cannot be undone. see Updating existing presets for more info. - Move a preset:
click + dragpreset squares to organise them by changing their position in the list. This operation is non destructive: if you drag a preset onto a filled slot, all subsequent slots will be offset by one to leave a place for the dragged preset. - Rename a preset:
control + clicka filled preset slot to rename it. Hit enter once you’re done editing. If you use that preset in the Presets grid, its name will be updated there too. - Lock/Unlock a preset:
control + shift + clicka filled preset slot to lock/unlock it. A locked preset cannot be overwritten, renamed or deleted, but can still be moved. - Delete a preset:
shift + option|alt + clickon the square of a filled slot to delete the preset. This action is permanent and cannot be cancelled. - Add/remove slots: By default, you can scroll the list up to 50 preset slots and you can add more lines by clicking “add slot” at the bottom after the last visible slot. If you open a project with presets stored in slots higher than 50, then all the required slots will be automatically visible.
- Recall (load) a preset: double-click the square on the left of a filled preset slot. If an interpolation time is set (see 3. below), the current state will be interpolated toward the clicked preset in the set time. If you want to recall a preset immediately with no interpolation, you can hold
-
Interpolation time and progress bar (available only for performance presets: scenic, performer and blackbox): On the upper right corner is a number box showing the interpolation time (expressed in seconds) and on its right a slider showing the ongoing interpolation. When starting an interpolation, the current state of parameters will be saved in a temporary preset, and the interpolation will occur between that temporary preset and the target preset. This ensures seamless interpolation to any target preset even if some parameters are manually operated.
Updating existing presets
Section titled “Updating existing presets”Working with presets can sometimes require meticulousness, especially when it comes to editing existing presets. It takes a bit of practice to get used to the way presets work, so here is an example to get you on track.
Let’s say you work on a show involving playing three videos simultaneously (like three Media players routed to three Layers). You may have a bunch of Scenic presets with your three videos playing, each preset having its own specificities, like different blending, positioning, scaling or effects. Now you realize you want to add a fourth video to the show. The first step is to make sure your Setup preset is ready for this, ie. that the fourth Media player is selected as a source for a Layer module. Once the Setup preset is updated, you can easily create new Scenic presets with all four videos, but how to deal with existing Scenic presets showing only three videos? For each of them, one by one, you will need to recall them, add the fourth video (set the Media player and Layer to your liking) and overwrite the current preset.
To summarize the required steps:
- If necessary, update the Setup preset (or create a new one) to accommodate your new idea.
- Recall a Scenic/Performer/Blackbox preset that you want to update (you need to update only the type of preset that saves the parameters you want to change):
- Update the desired parameters with what is new (and only them)
- Overwrite the current preset
- Repeat from step 2. with another preset you want to update.
Preset Editor
Section titled “Preset Editor”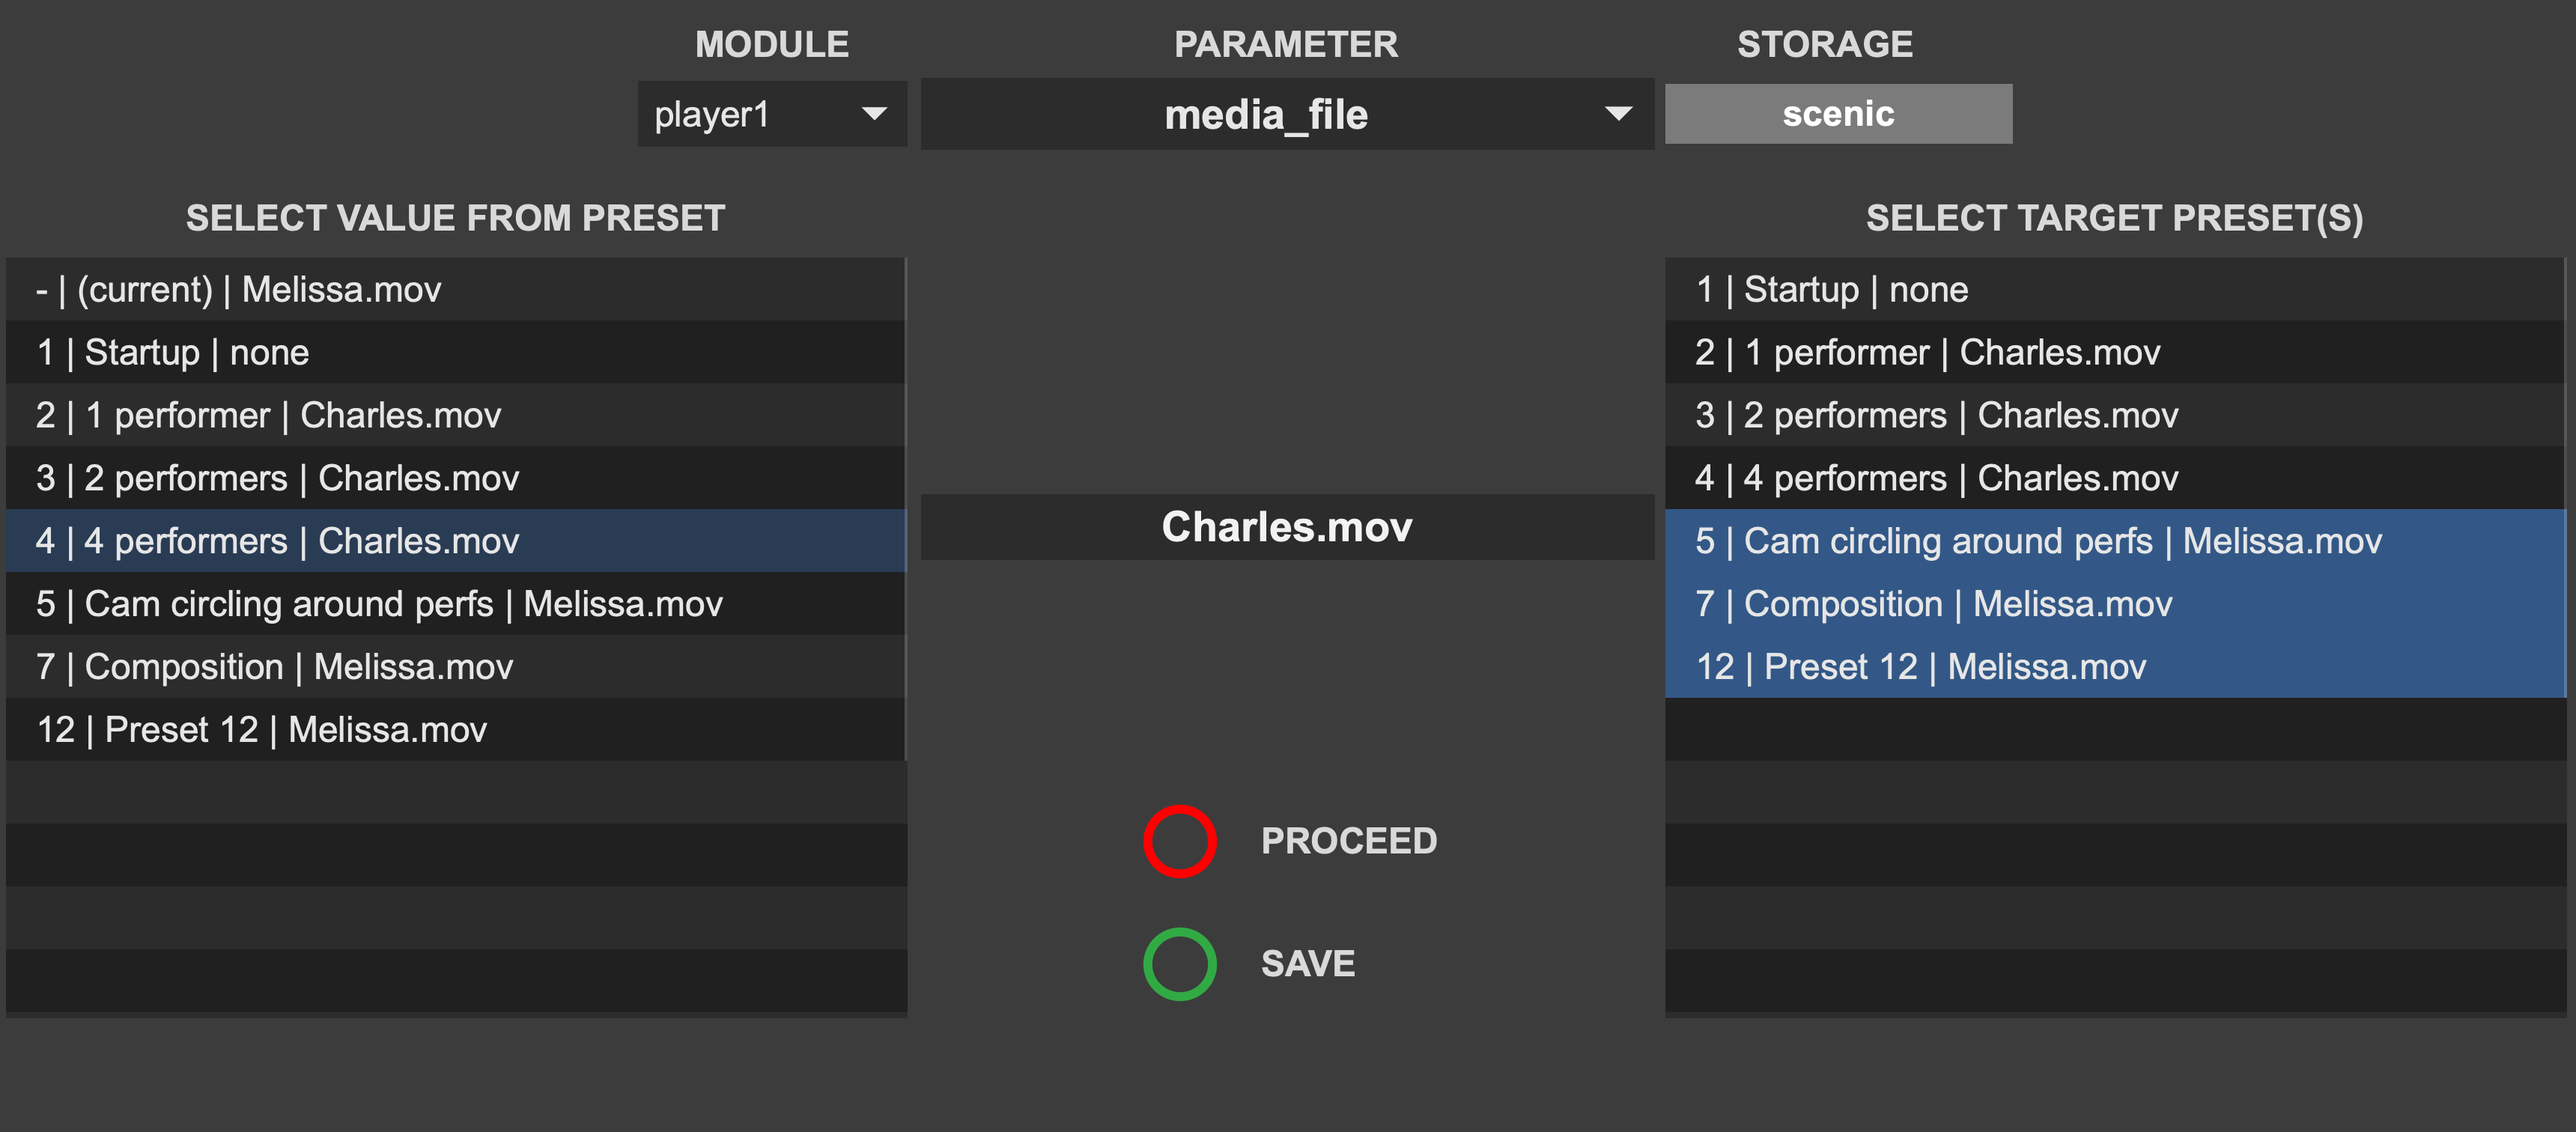
The Preset Editor is a tool allowing to copy value of a parameter from one preset to other presets of the same type. It can be accessed through the Tools menu (⚙︎) from the Dashboard.
First you select the desired param to update, then on the left you see the value of that param for each preset (and its current value), you select one of them, and on the right you select which presets you want to change the value of. You can select multiple presets if you want by holding shift or cmd. Then you press “proceed” to copy the value, and finally you save your changes if you think you’re good. Works with scenic, performer, blackbox and setup presets.
Once you know which parameter you want to copy the value of, the tool is quite straightforward to use:
- Select the module in which lives the parameter that you want to address.
- Select the parameter. The type of preset that parameter belongs to is displayed under the
Storagelabel, and left and right panels will be populated with the list of all presets of that type. Each row represents a preset, displayed as such:<preset number> | <preset name> | <parameter value>. Left panels top row shows the current value of the parameter. - In the left panel, select which preset you want to copy the value from. That value appears between both panels.
- In the right panel, select the preset(s) for which you want to change the parameter value. You can hold
commandto select multiple presets. - Click the
Proceedbutton to set the parameter value for presets selected on the right to its value in the preset selected on the left. At this point, presets are edited and you can test them, but changes aren’t yet saved in the preset file. Notice that if you save, rename, delete or move a preset of the same kind at this time, the edited parameter will be updated in the preset file (as if you clicked theSavebutton described below). - Click the
Savebutton to save the changes to the preset file. This action cannot be undone.
As an example, in the image above, the user is about to replace the value of the media_file parameter of Player 1 in the Scenic presets 5, 7 and 12 by its value Charles.mov in preset 4. Which means that, after pressing Proceed, presets 5, 7 and 12 will now recall Charles.mov for Player 1 instead of Melissa.mov.
Manipulating preset files
Section titled “Manipulating preset files”Presets are stored as JSON files living in the Project folder. Each type of preset has its own file, with the specificity of the four performers, each having their own presets file:
Directory
<project folder>Directorypresets/
- blackbox.json Blackbox preset file
- fx.rack.json FX rack preset file
- scenic.json Scenic preset file
- performer_1.json
- performer_2.json
- performer_3.json
- performer_4.json
- setup.json Project setup preset file
- track_macro_mappings.json Macro control presets for the Mixer tracks
- … (see Projects for the complete project folder structure)
Every time a new preset is created, or changes are done to existing presets (saving, renaming, overwriting, moving, deleting), the file storing that type of presets is automatically updated in the background.
To some extent, these files can be exchanged across projects. For example if you want to import your Performer 1 presets from one project into another, you can simply copy performer_1.json from the source project and paste it in the presets/ folder of the target project. Main limitations are about Scenic presets: used media files (for the Media players, Torrent and Stage’s skybox) have to be present in both project folders for the presets to load correctly. Moreover, you need to use similar setup presets, especially similar Module settings, in order to use the same modules and have the scenic presets to work as expected.
If you want to import one specific preset (ie. Scenic preset N°17) from one project to another, then things get more complicated and you need to carefully manually edit the JSON files.