Macro assignment
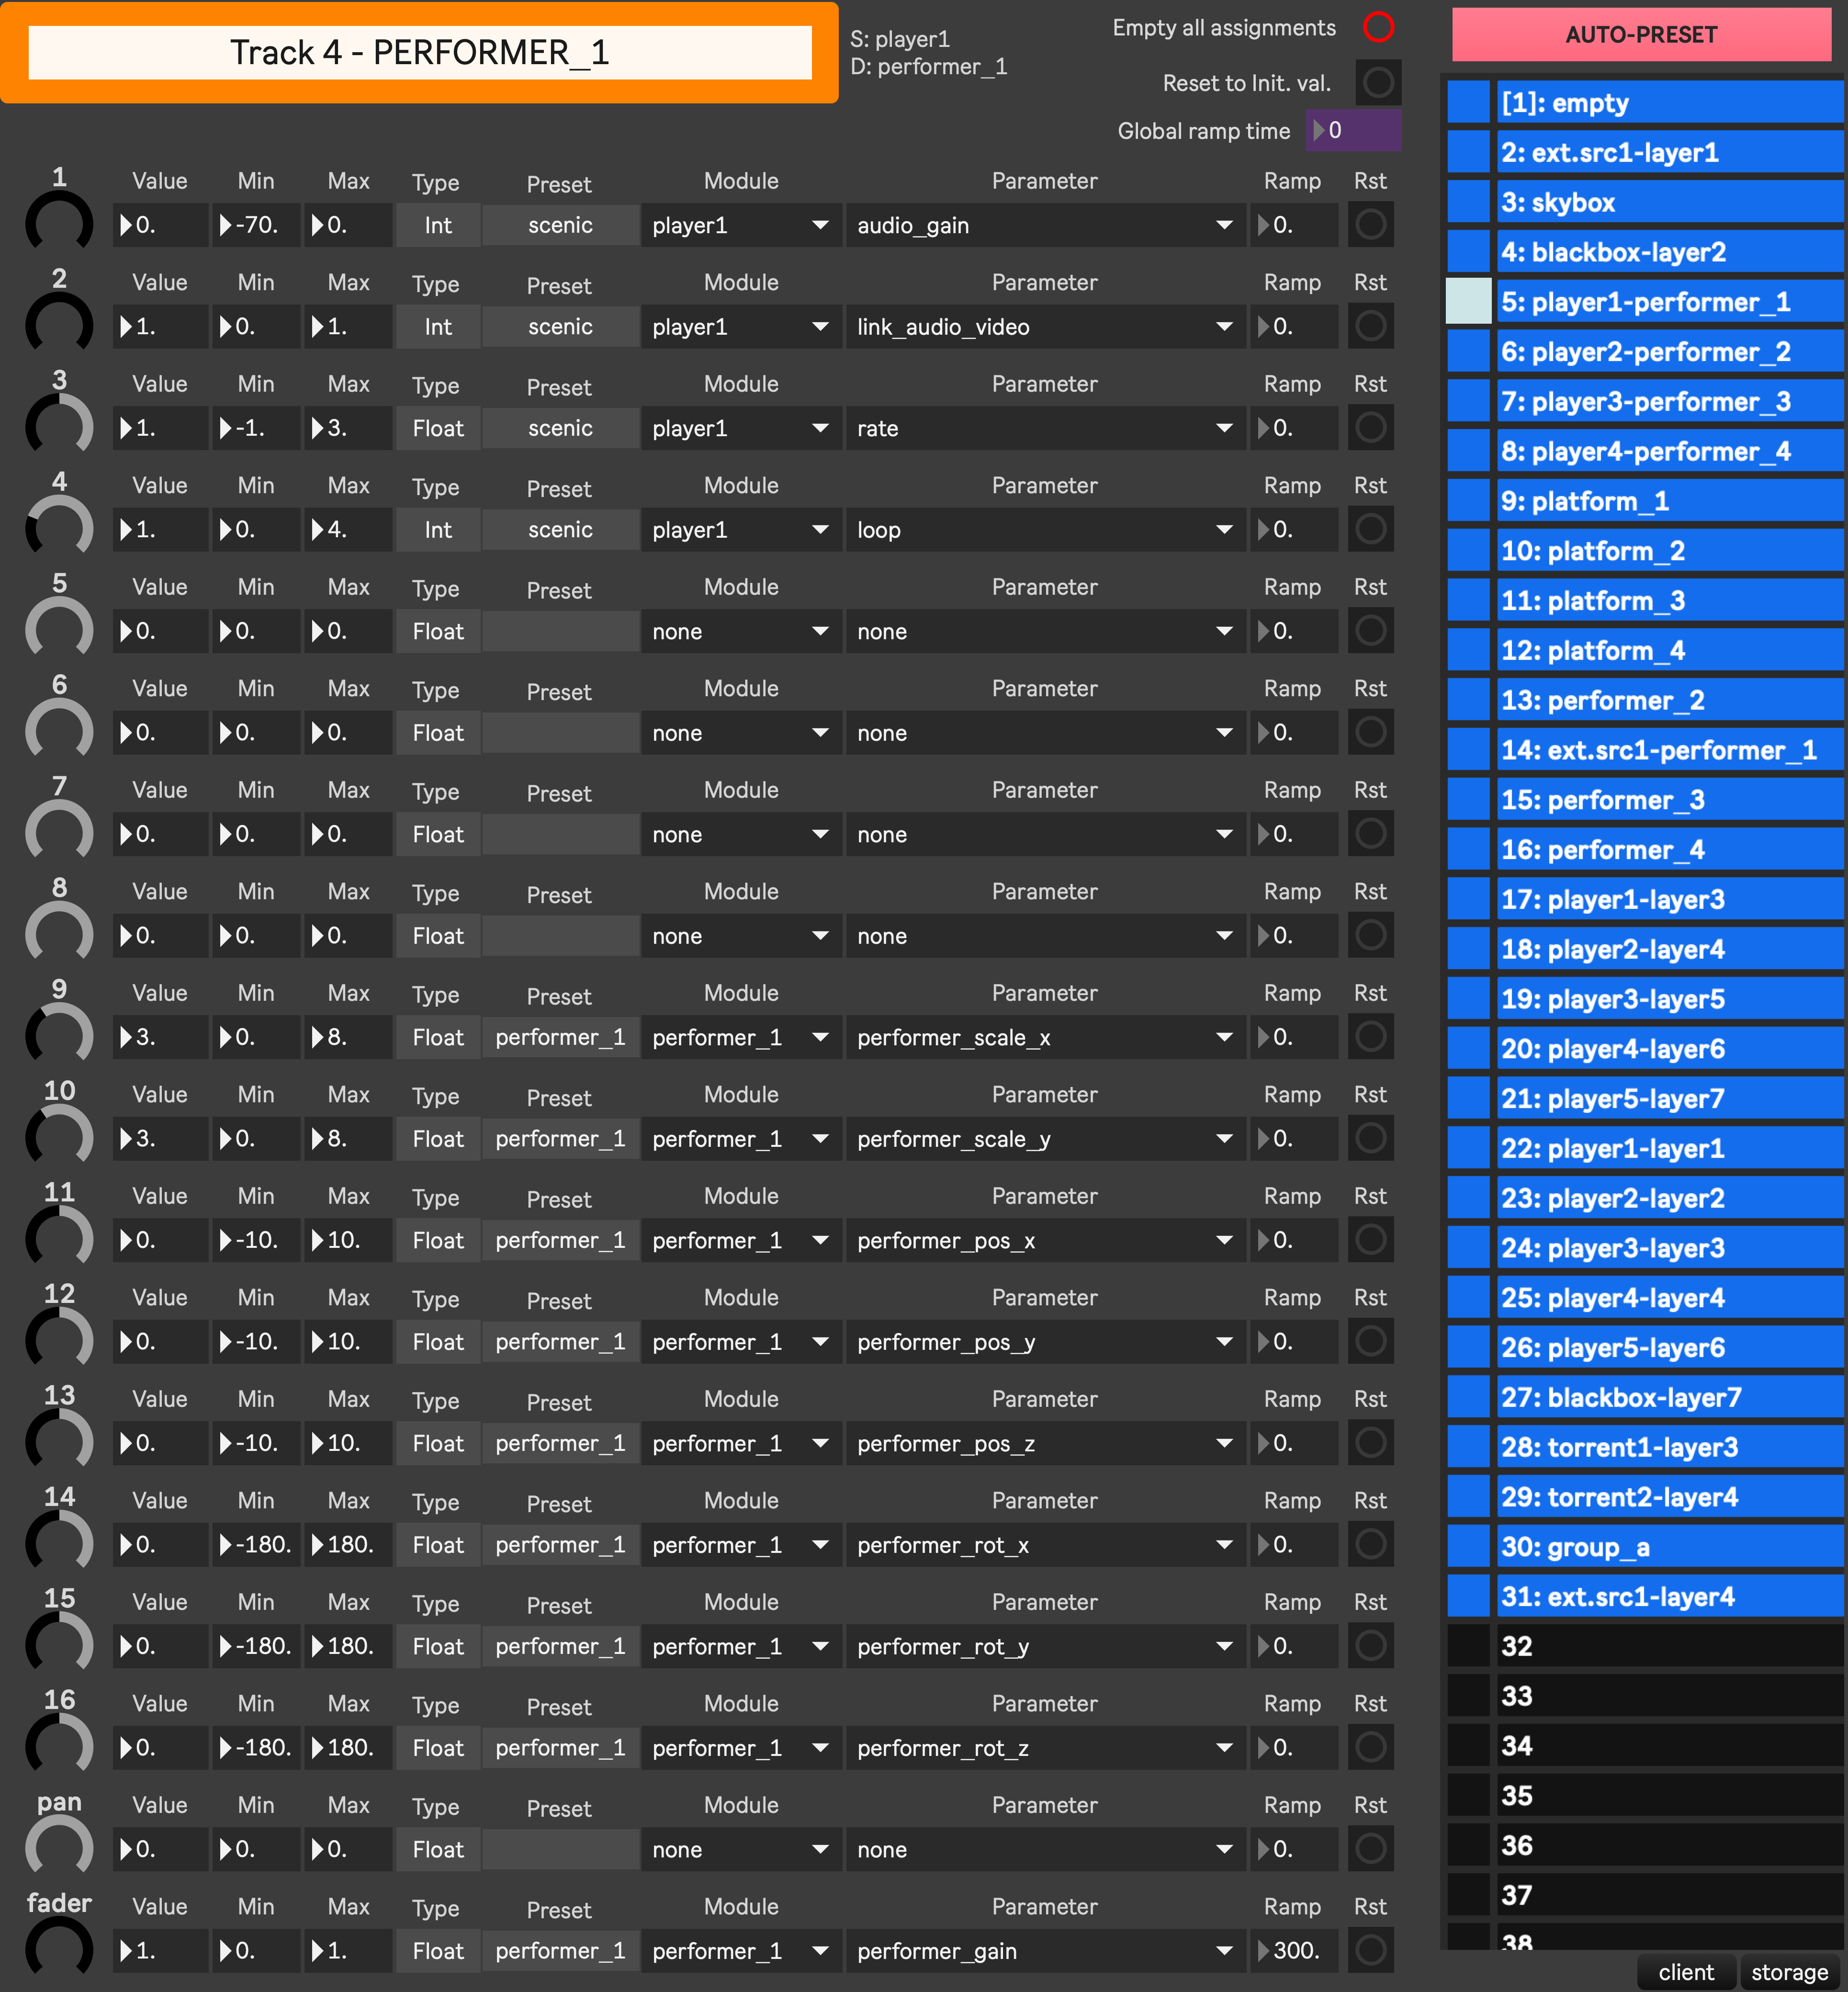
The Macro assignment window allows to map all macros (including fader) of a given Mixer track to parameters from the app’s modules. Each track has its own window that can be opened from the Mixer or the Track settings.
The biggest part of the window is occupied by all 16 macros of the track (see the number on the left) and the fader macro (which is essentially the same as other macros, with the exception that it is accessible as a fader on the Mixer interface). You will notice an extra pan macro, here for historical reasons and fully functional, except that it cannot be MIDI mapped and won’t appear in the Virtual Control.
The right part is dedicated to Macro control presets, storing the mapping between parameters and macros.
The relationship between a track and its Macro preset is stored in the Setup presets
How to use
Section titled “How to use”Automated mapping
Section titled “Automated mapping”Macro assignment can be done automatically, either on a per-track basis by clickcing the AUTO-PRESET button of a Macro assignment window, or for all tracks at once by using Auto-Config Mixer Tracks.
The automatized process will first check if a preset already exists for the source and destination modules located on this track. It does so by checking the preset name, which should match <src_name>-<dest_name> (or just one of the two if the track has only a source or only a destination). If a matches that name, it will be recalled. If not, then a new preset with that name will be created, following the Default macros that can be defined in the Default Macros editor.
Manual mapping
Section titled “Manual mapping”Macro presets can be done manually, either by editing existing ones or by creating new ones. If you want your presets to be picked by the Auto-Config Mixer Tracks feature, their name need to match the pattern as defined in Automated mapping.

- Here we are editing the macro n°1. When editing a macro by yourself, the first thing you might want to change is which module the parameter you want to map belongs to. Click the Module list and select the desired module.
- Then the Parameter list will update, showing only the available parameters for the selected module. Select the parameter you want to map to macro 1 here.
- You can then check the type of the parameter, and in which type of Preset it is stored. Note that only parameters of type Float and Int can be controlled through the Macros and remote controls. Parameters of other types won’t be listed here anyway.
- The current value of the mapped parameter appears here. You can use that field to freely edit the parameters value without range constraint.
- Here is the knob representing the current macro and its value within the defined range.
- The Min and Max values define the range of the parameter. When you select a new parameter, its default range is set, but you are free to modify it, allowing you to have finer control over a narrower range, or a wider range at the cost of less precision. Note that some parameters will be internally clipped and/or won’t accept values beyond their default range. If a custom range is defined, it won’t affect other macros mapped to the same parameter.
- The ramp time defines the time required for the parameter to get from its current value to its new value set from here or a remote control. This allows to smooth out quick changes, which can be practical especially when controlling from a MIDI controller. Note that it doesn’t affect the way the mapped parameters value changes through preset recalls.
- The Reset button resets the parameter to its default value, which is its value in the preset n°1 of the preset type it originates from.
- Repeat the process with other macros.
- Once you are happy with your mapping, mind to save it as a new Macro assignment preset.
- Finally, make sure to recall that preset on the desired Mixer track, and save the track configuration in a Setup presets.
Default Macro Editor
Section titled “Default Macro Editor”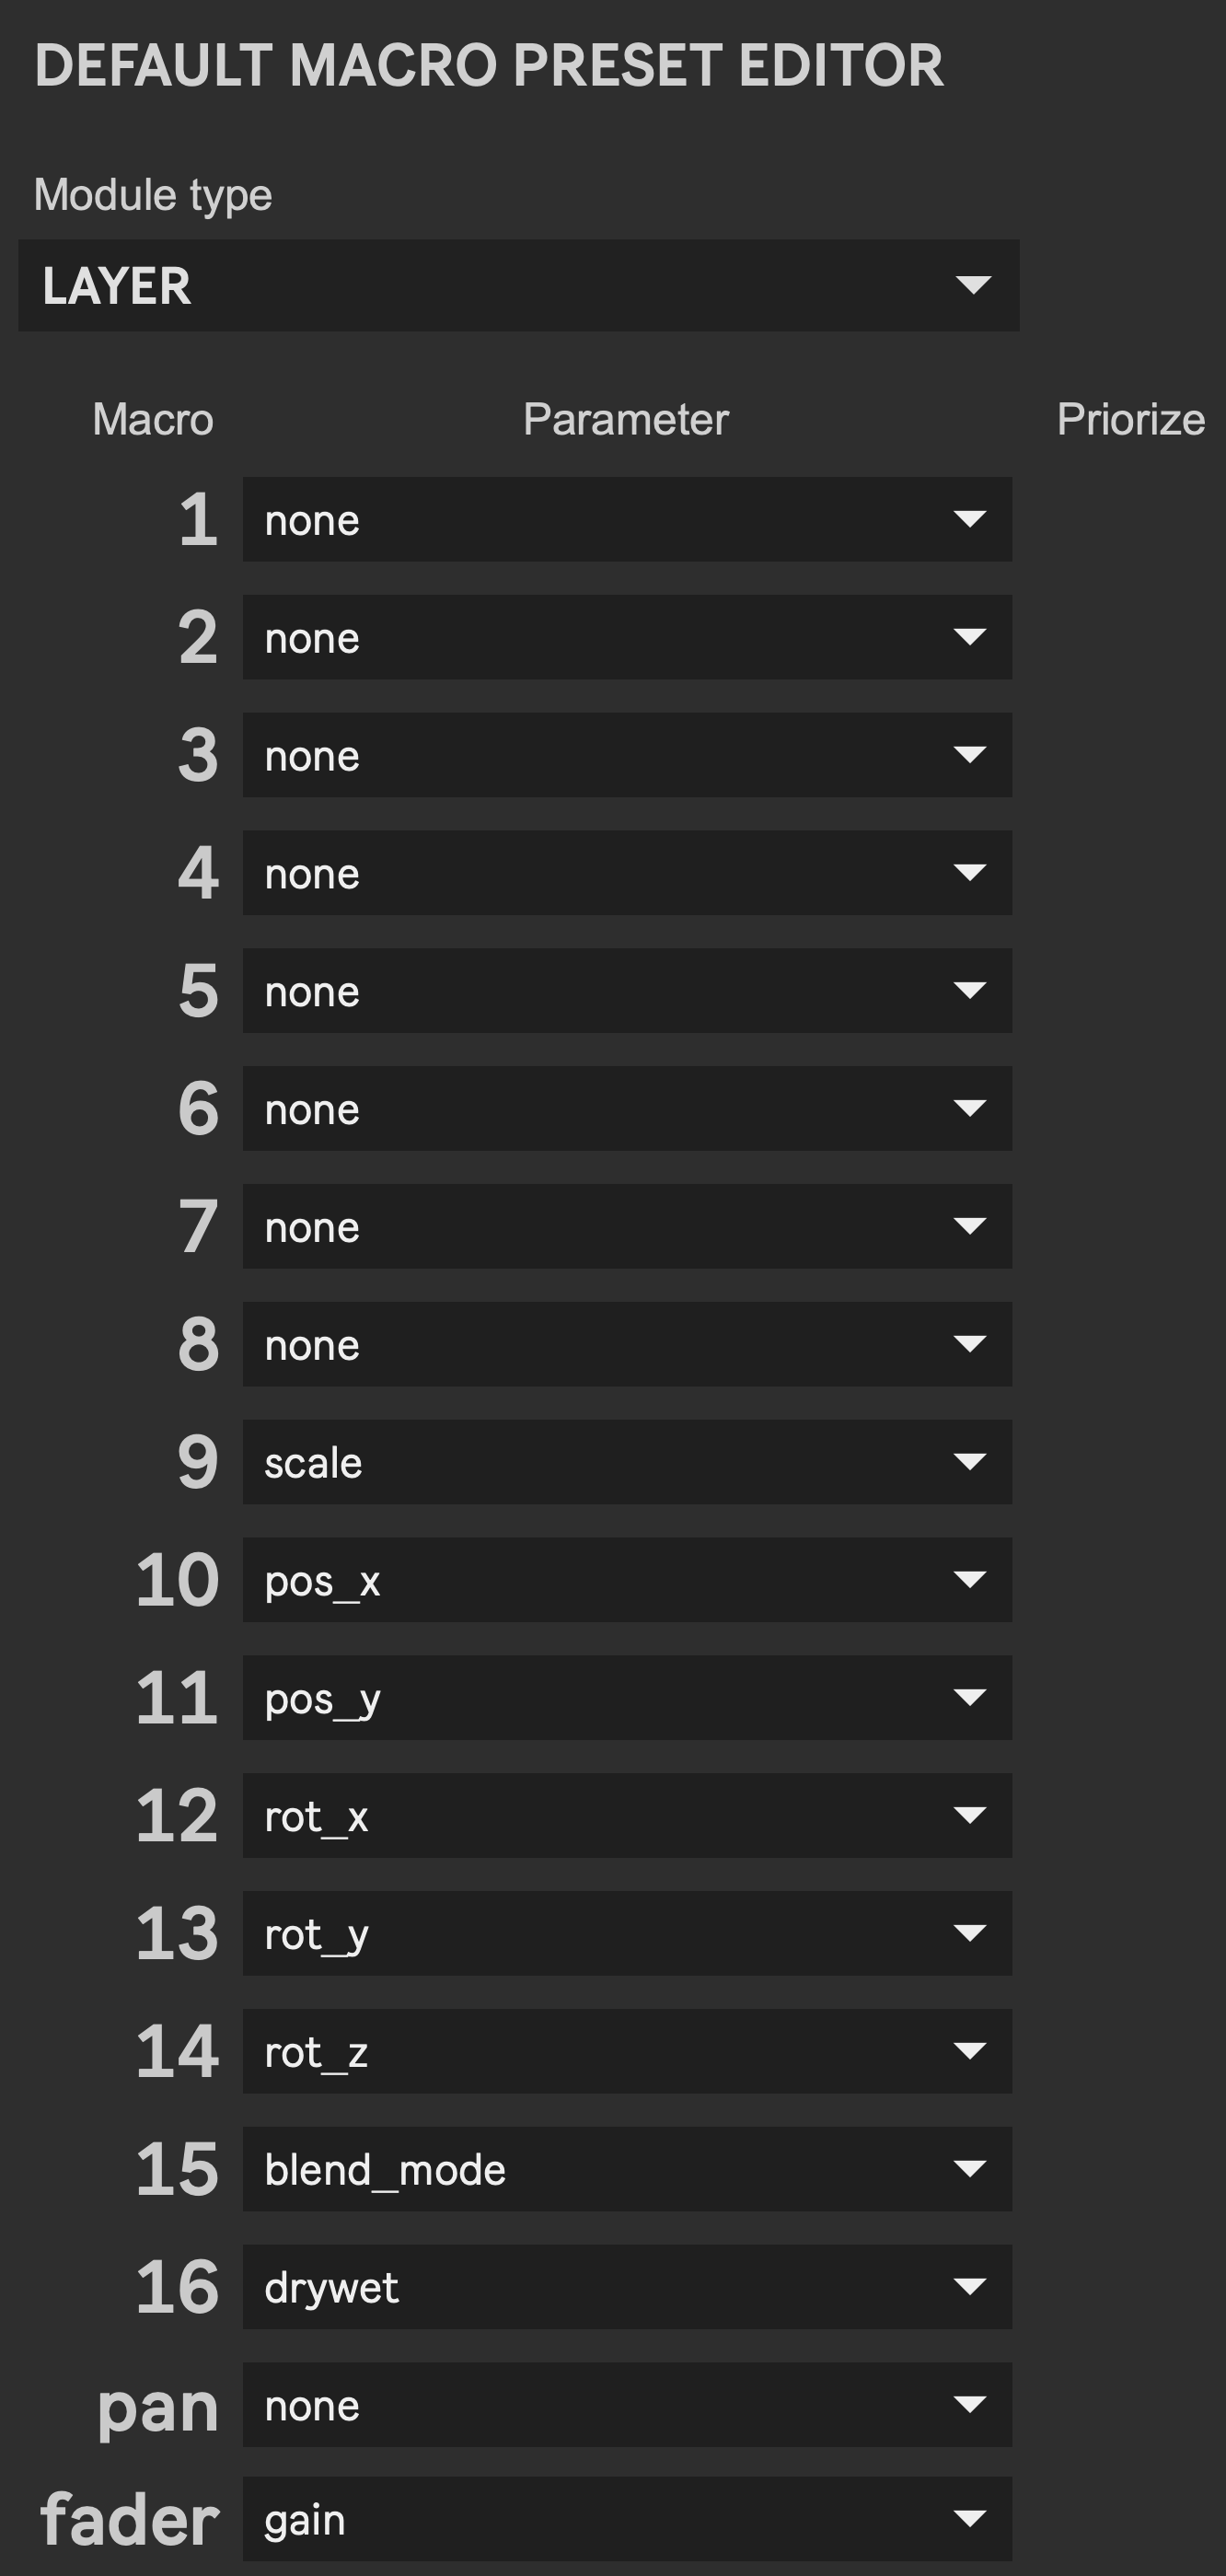
Accessible from the Interface section of the Project settings, the Default Macro Editor allows you to define, for each type of module (Layer, Group, Skybox, Performer, Platform, External source, Media player, Torrent, Blackbox, Noise, Text), which parameter each of the 16 macros and the fader should be mapped to by default. These defaults are used whenever a new Macro assignment preset needs to be generated automatically for a track - either individually with the Auto-conf button in Tracks settings, or for every track at once with Auto-Config Mixer Tracks.
When a track combines a source and a destination module (eg. a Media player routed to a Layer), the destination’s default macros are applied first, then the source’s are applied on top of any macro left unmapped by the destination - unless a source default is explicitly set to take priority, in which case it overrides the destination’s mapping for that macro. As shipped, source defaults tend to occupy macros 1-8 while each destination type’s defaults occupy macros 9-16 + fader, letting both live side by side on the same track without colliding.
Changes done to the default macros are automatically saved in <project name>/presets/modules_default_macro.json and will only impact new automatically generated macro presets. If you want to re-apply your new default to existing macro presets, simply delete them and let “Auto-Config Mixer Tracks” re-generate them.